 The DC Job Overview page
To go to the DC Job Overview page, open the DC Job tab.
General
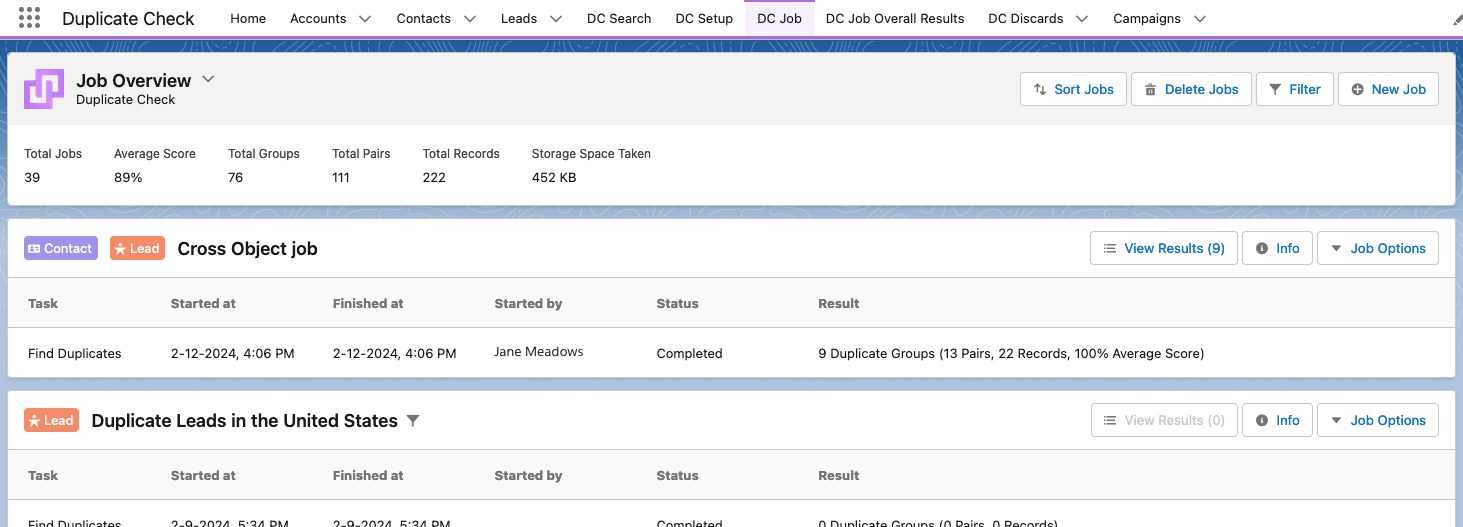
At the top of the DC Job Overview page you'll find information and buttons that apply to all jobs.
From left to right:
 |
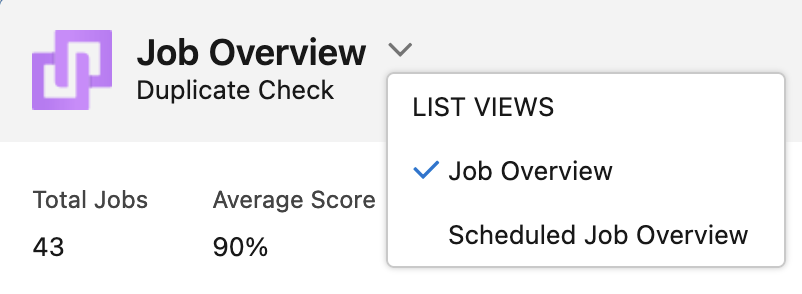
At top left, click the Down arrow  next to the Job Overview header to switch between the overview of single jobs and the Scheduled Job Overview. next to the Job Overview header to switch between the overview of single jobs and the Scheduled Job Overview. |
 |
The statistics show the numbers for all jobs together. |
 |
Sort the job list by a field of your choice, in ascending or descending order. |
 |
Bulk delete jobs to clear up space. Delete all jobs that meet specifications such as "created between a certain date range", "of a certain type", or "contains duplicate results" or not. Scheduled jobs can be deactivated and deleted from the Scheduled Job Overview. |
 
|
Filter the listed jobs to only show certain jobs. A blue button means a filter is currently applied to the overview. |
 |
Create a new DC Job or Scheduled Job to find duplicate records. Read more here. |
Job Info
Once a DC Job is created, it appears in the job list. Individual runs of scheduled jobs are shown here as well.
- In the header of each job, you find the Object it ran on, or Objects in the case of a Cross Object.
- Each job has a checkbox in front of it. When checked, options to delete one or more selected jobs appear.
Check one or more job checkboxes, or click Select All . Then click Delete Selected Jobs
  to delete them.
 - Next to the job name an icon might be shown. Hover over it to see more details. For example, a Filter icon indicates a filter was used in the job, and on hover you will see the filter specifics.

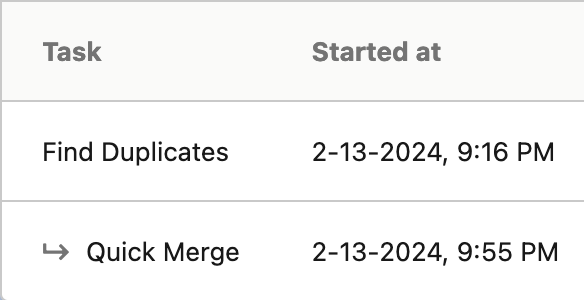
- Each job shows its most important information, such as its task (e.g. Find Duplicates, Quick Merge), its start and end date, the user that started the job, its status (e.g. "Processing"), and a summary of the result.
- If a job is processed further, for example some of its found duplicates are merged, a new line appears below, showing a summary for this.

Further info and options
To find and process the job results, see extensive job information, and apply job options, use the buttons at the right of each job.
 |
View Results will open the DC Job Detail page, where all job results are shown to be processed further (merge, convert, share, apply a DAP action). The counter in the button name represents the current number of unprocessed results, and will be recalculated after merging or discarding results. In older jobs, "View Results" might be greyed out if all results have been processed in the meantime. You can still view data about the initial results found under Info. |
 |
Info shows extensive job information, see below for an explanation. |
 |
Click Job Options for quick job actions, such as restart the job, start Auto Merge/Convert, or export the results. See below for an explanation. |
Info
The Info modal shows you everything you could want to know about a job.
- General Info: information such as the Job ID and Total Time Taken. "Processed By" shows where the job was executed: either within Salesforce, on DC Local, or on Plauti Cloud.
- Selected Records shows the Object, the number of records in the job, and details about any filter used.
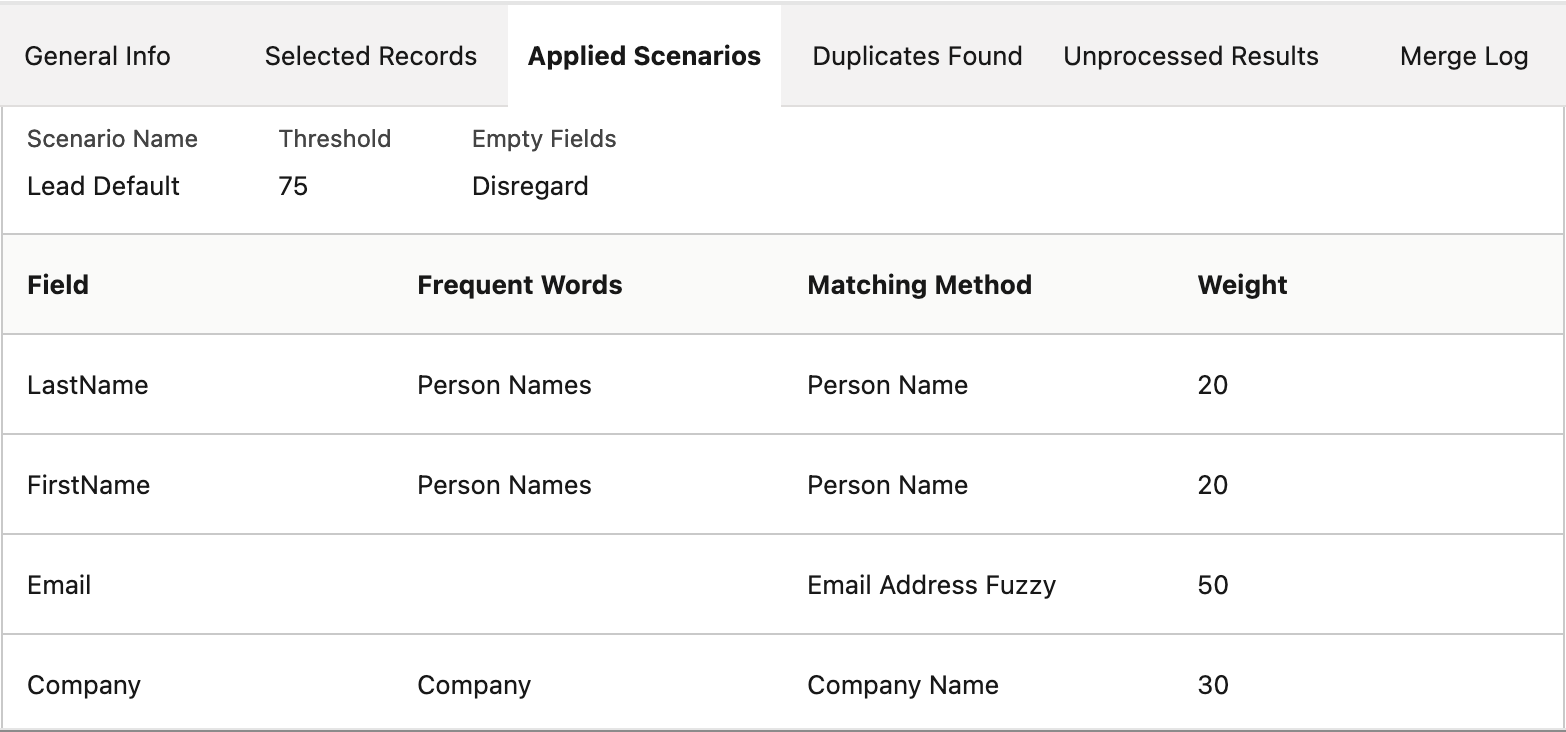
- Applied Scenarios shows detailed information about the scenarios used in the job, like the fields, matching methods, weight and threshold, making it easier to analyze any unexpected results.
- Duplicates Found shows a summary of the initial job results. Later on these results may have been processed further, so the current number may be less.
- Unprocessed Results shows how many duplicate groups, pairs and records haven't been merged or converted yet.
- The Merge or Convert Log shows an audit log of any processed results of this job. Hover over the i icon
 at each line to see more details such as the record ID of the merged or converted records. The master record can be clicked to open it.
 The Applied Scenarios tab of the Info modalJob Options
You can apply a number of actions to a job:
- Restart: restart the job. The restarted job will appear as a new job in the list. It will run with the same configuration as the previous job, but if any scenarios, predefined filters etc used in the job were changed in the meantime, these will be applied in their most recent iteration.
- Start Auto Merge or Auto Convert: Auto Merge or Auto Convert the job results.
- Export Result: export the job results to a file via DC Local or Plauti Cloud. A .csv file is created containing job data such as group numbers, pair IDs and scores, and record data that you can predefine. Read more here.
- Share Job: Share DC Job results via mail, tasks, or by sharing a direct link. Share an entire duplicate results list or a subset. This way you can grant access to a particular results list without having to grant the user access to all other duplicate check jobs.
-
Delete Job: delete the job to free up space. All unprocessed records will remain untouched. Single runs of scheduled jobs are deleted this way. With the "Delete Jobs" option at the top of the Job Overview, or by checking the checkbox in front of a number of jobs, you can delete multiple jobs in one go. Read more about deleting jobs here.
To stop a scheduled job from running more jobs in the future, go to the Scheduled Job Overview and deactivate or delete it there.
