 If RV Live was not yet in use for a certain object, please see How to add and configure Record Validation Live to your page layout in Salesforce Lightning on how to add RV Live to that object. Next to adding the RV Live component to the page, there are some other steps to take in order to put RV Live into use.
Out with the old, in with the new
To switch out the old Record Validation component for the new RV Live component:
- Go to the Object where you want to add RV Live.
- Open a record of the Object.
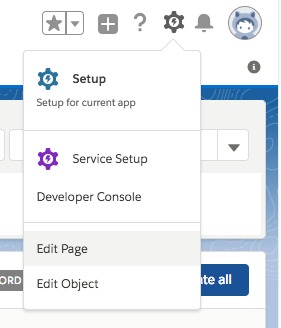
- At top right, click the Salesforce Setup icon and select Edit Page.

The Salesforce Lightning App Builder opens.
-
At the page layout, remove the old Record Validation (deprecated)
 component from the page layout by hovering over it and clicking the Delete icon.
 You can check that it is the old component by clicking on it, it will show "Record Valication (deprecated)" at top right.
- At left, under 'Custom', find the new RV Live
 custom component.
- Place it on the page by dragging it onto the page layout.
 Read more on how to place the component on the page here.
You can check that it is the new component by clicking on it, it will show "RV Live" at top right.
- Click Save
 to activate.
 - Repeat for each object where you are using RV Live.
