Step 1 Adding DC Live to a Object Layout
To be able to see the DC Live custom component in the 'Salesforce Lightning App Builder', first you need to define your 'My Domain Subdomain name'. Navigate to this Salesforce tutorial about how to enable your domain and follow the steps.
- Navigate to the *Object* you want to add DC Live component for.
- Click on a record to open it.
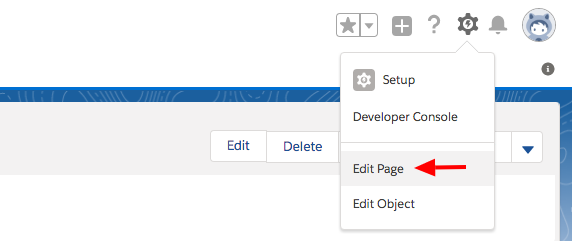
- On the top right of the page, click the Salesforce Setup icon and choose 'Edit Page'. Example image below:

- Now, after you have your domain ready, at the left under 'Custom - Managed' you should be able to see and add the DC Live custom component by just dragging it to the Salesforce Builder.
- After that click the 'Save' button on the top right to finish the installing of the DC Live component.
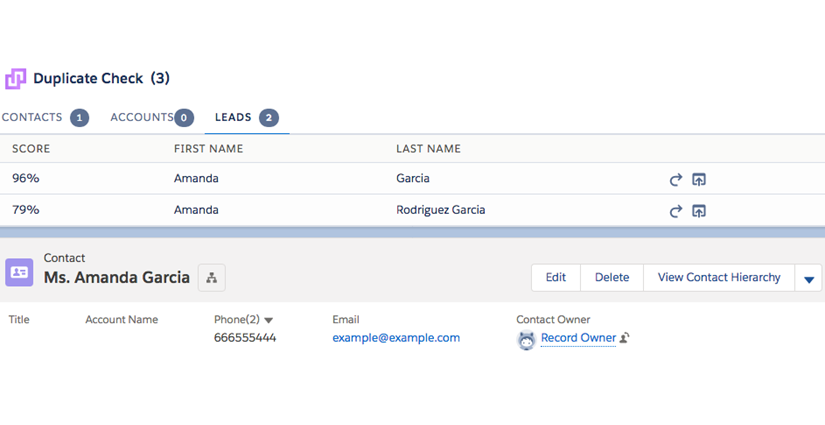
This is what DC Live looks like running in your *Object* page layout:
 Click here to watch a short video of how to add DC live to your Object Layout.
Step 2 Applying a Scenario to DC Live
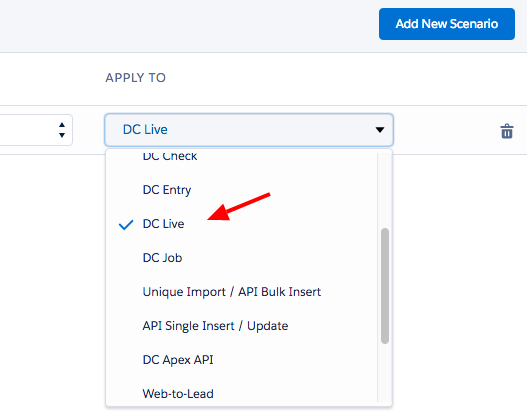
- Now navigate to the DC Setup page, chose the *Object* you just enabled the DC Live for and make sure to apply the DC Live feature to its scenario. Example image below:

