When importing any records into Salesforce, it is likely that some records will match your existing data, creating duplicates in your Salesforce Organization. Duplicate Check for Salesforce comes with the Unique Import feature, which matches your imported data with your existing data. After analyzing the data, it allows you to merge the duplicate records. Import data without worrying, let Duplicate Check for Salesforce do the job and keep your data quality as high as possible.
Step 1 How to enable Unique Import
- Navigate to the DC Setup page.
- At *Object* Setup navigate to the particular Object you want to enable Unique Import for.
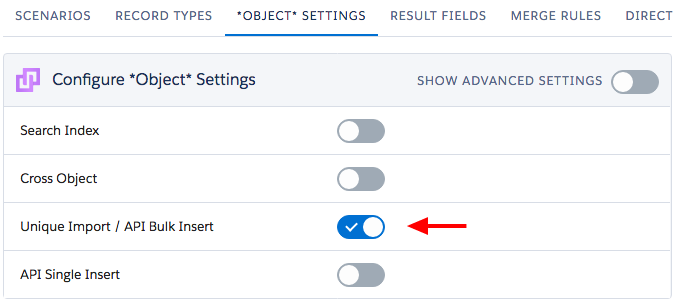
- Go to the *Object* Settings tab and Enable the Unique Import / API Bulk Insert setting.

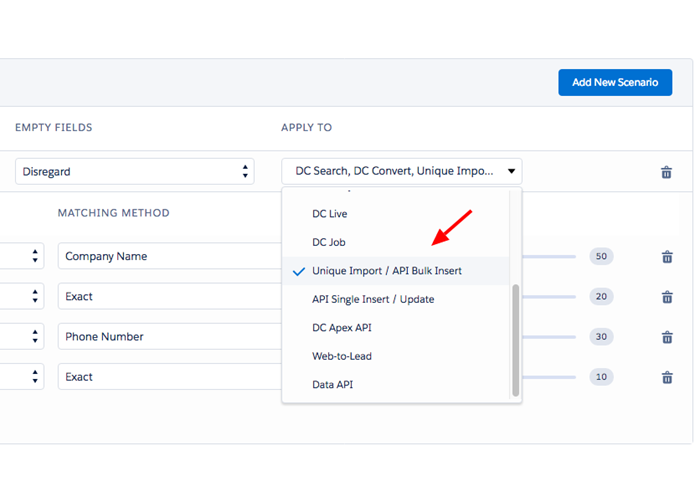
- Navigate to the *Object* scenario tab and make sure you have applied a scenario to the Unique Import feature.

Step 2 Import records
After you have enabled the Unique Import feature, now you are ready to import. Duplicate Check works with any tool available, like the Salesforce Data Import Wizard or Dataloader.io. After you have imported the records, the 'Unique Import' job will automatically start at the DC Job page.
If you abort the job, or if the job does not complete, a 'unique import' button appears. After clicking the button, the Unique Import will continue the job.
Step 3 Review results and merge
- Navigate to the DC Job page to find the Duplicate Check results from the import and choose the best way for you to merge them - Manual merging, Quick merge, Auto merge. Learn more about merging records.
