Add Use Plauti Assign action button to page layout
Plauti Assign's “Use Plauti Assign” field is always present behind the scenes for all Objects that are set to be processed by Plauti Assign.
This article explains more about adding an action button for the field to a record's page layout, which is optional.
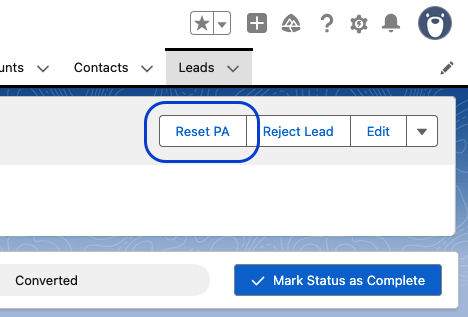
The Use Plauti Assign field can be displayed on page layouts, but it always shows all options in its picklist. If you find this confusing, or you do not want to offer your users all options, you can create a single-option Lighting Action button and add that to the page layout instead. For example, add a button for setting the Use Plauti Assign field to FALSE or REJECTED.
The instructions below use the FALSE setting as an example, but a button for REJECTED or TRUE is created the same way. First we'll create a new action, then add it to the page layout as a button.
Creating the button
Go to the Salesforce Setup > Object Manager and open the Object where you want to add the button.
At left, click Buttons, Links and Actions.
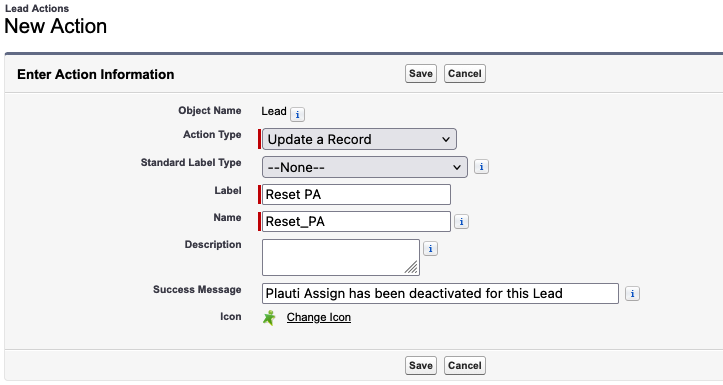
At top right, click New Action
 .
.Enter the details for the new action.
- Action Type: Update a Record
- Standard Label Type: leave empty
- Label: enter a name for the button, e.g. “Reset SRR”
- Name will be populated automatically
- Optionally, you can enter a description, success message, and a different icon
Click Save.
On the next page, remove all prepopulated layout fields so that the layout is empty.
Click Save, ignore the warning about required fields, and confirm saving.
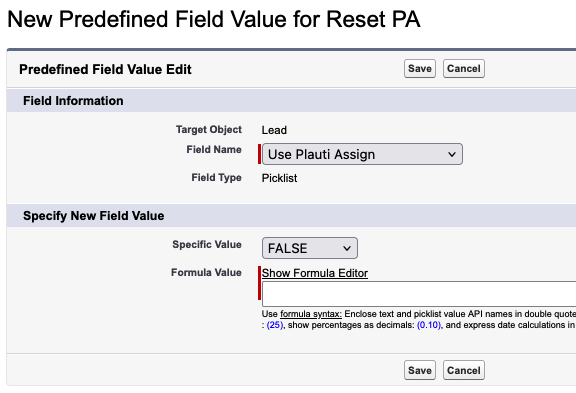
In the Predefined Field Values section, click New.
At Field Name, in the picklist's Custom Fields section, select “Use Plauti Assign”.
In the Specify New Field Value section that appears, at Specific Value, select FALSE.
Click Save.
The Action has been created and can now be added to the page layout as a button.
Adding the button to the page layout
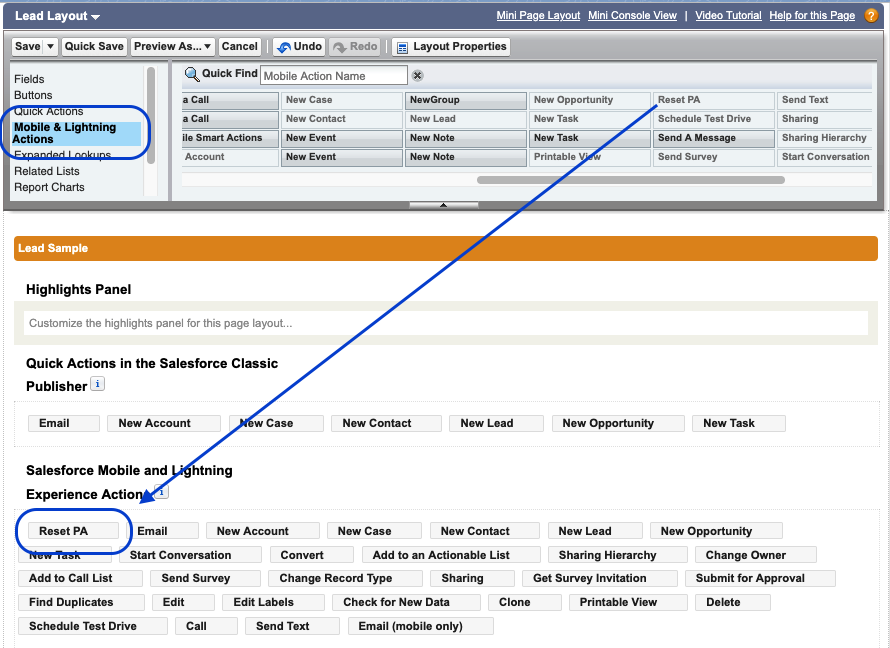
Go to Page Layouts and open the layout you want to use.
At the top, click Mobile & Lightning Actions.
Drag the newly created action to the Salesforce Mobile and Lightning Experience Actions section. You might need to override the predefined actions in this section first.
Click Save.
Refresh a record of the Object to see the new button. Depending on where you dropped it, the action might be shown as a button, or as an option in the Actions picklist.
In the same way you can create an action button for rejecting a record (Specific Value: REJECTED) or automatically reassigning a record (Specific Value: TRUE).
Read more about using the Use Plauti Assign field in Using the Use Plauti Assign field.