Step 1 Enable the Duplicate prevention upon manual entry in Salesforce Classic
- Navigate to DC Setup in the Duplicate Check App.
- At *Object* Setup navigate to the particular object you want to enable prevention upon manual entry for.
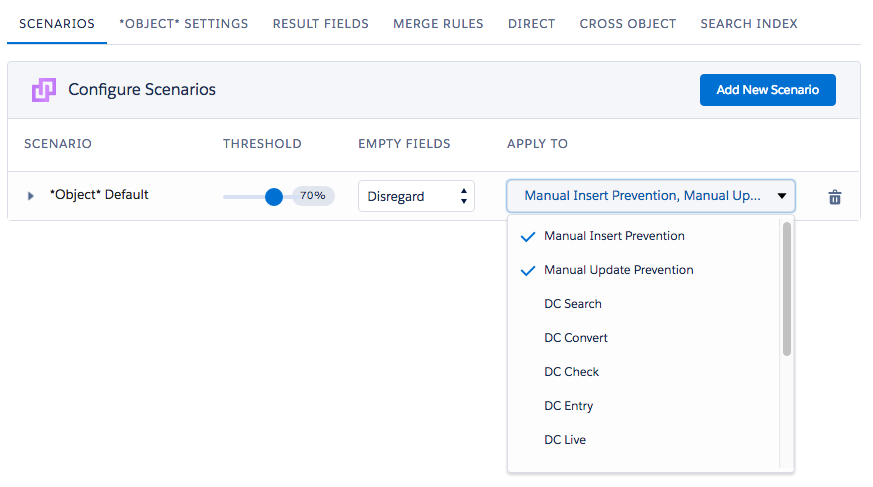
- Navigate to the *Object* scenario tab and make sure that you have applied a scenario to Manual Insert Prevention and Manual Update Prevention. Check the example image below.

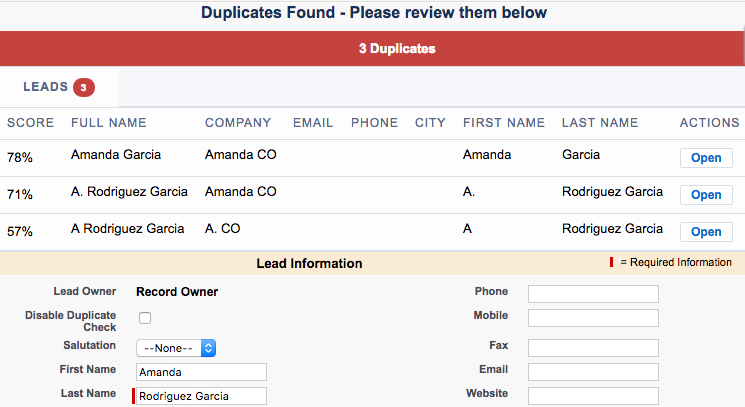
- Creating a new record in your salesforce environment now automatically triggers the duplicate prevention and shows you the results.

- If the new entry record is shown as a duplicate, but you consider it as a fake duplicate, for example, the record can be a family member or relative and not a duplicate, simply allow the creation of the record by disabling the Duplicate entry prevention by checking the Disable Duplicate Check checkbox. If the checkbox has not been added to the page layout yet, please read this article.
